We turned the plain white front porch pillars on our house into cedar pillars, and we couldn’t be happier with the results!

Building a Dream House is a lot like planning a wedding: you read a million magazine articles, spend years collecting inspiration photos, and finally get every detail just the way you want it. And that works out wonderfully—if you completely stop reading magazines, browsing the internet, or scrolling through Pinterest after the big day.
But invariably, with either houses or weddings, you’ll see some amazing idea at some point down the road and feel a little pang of disappointment that you didn’t think to incorporate it into your plans. Don’t get me wrong; we LOVE our house. There are really very few things we’d change about it if we could do it all over again.
But there are a couple of things we’d do differently, some small and some significant. The door to the backyard from the basement, for example, is lined up right behind a pillar instead of being between two pillars, which would have made a million times more sense. All of our windows are the standard white-framed windows that pretty much everyone has in their house, but we’d do black-framed windows in a heartbeat if we could go back in time. And there are the inevitable dark corners that could use some extra light, and rooms that could use another electrical outlet or two.
Sometime last year, my husband and I were talking about how good our house would have looked with cedar pillars on the porch instead of white. It occurred to us that, unlike most of the other things we wished we’d done differently, this one was actually pretty easy to fix.
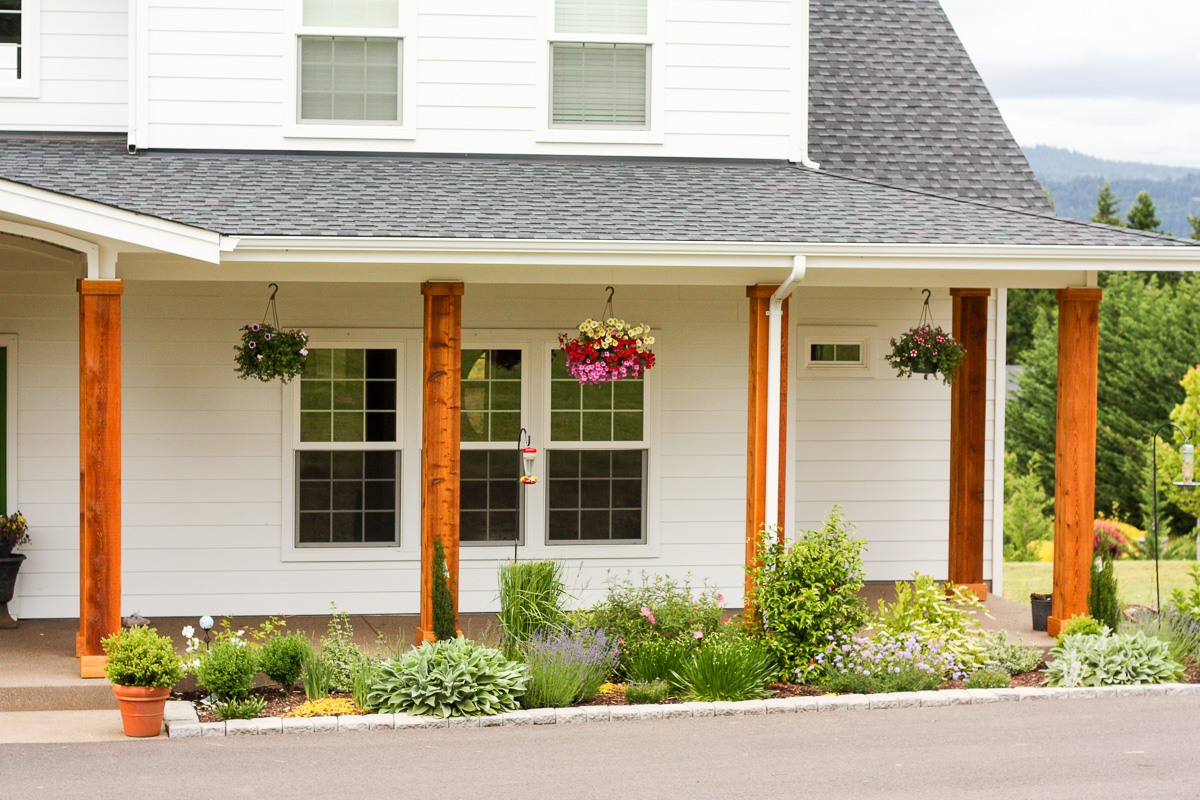
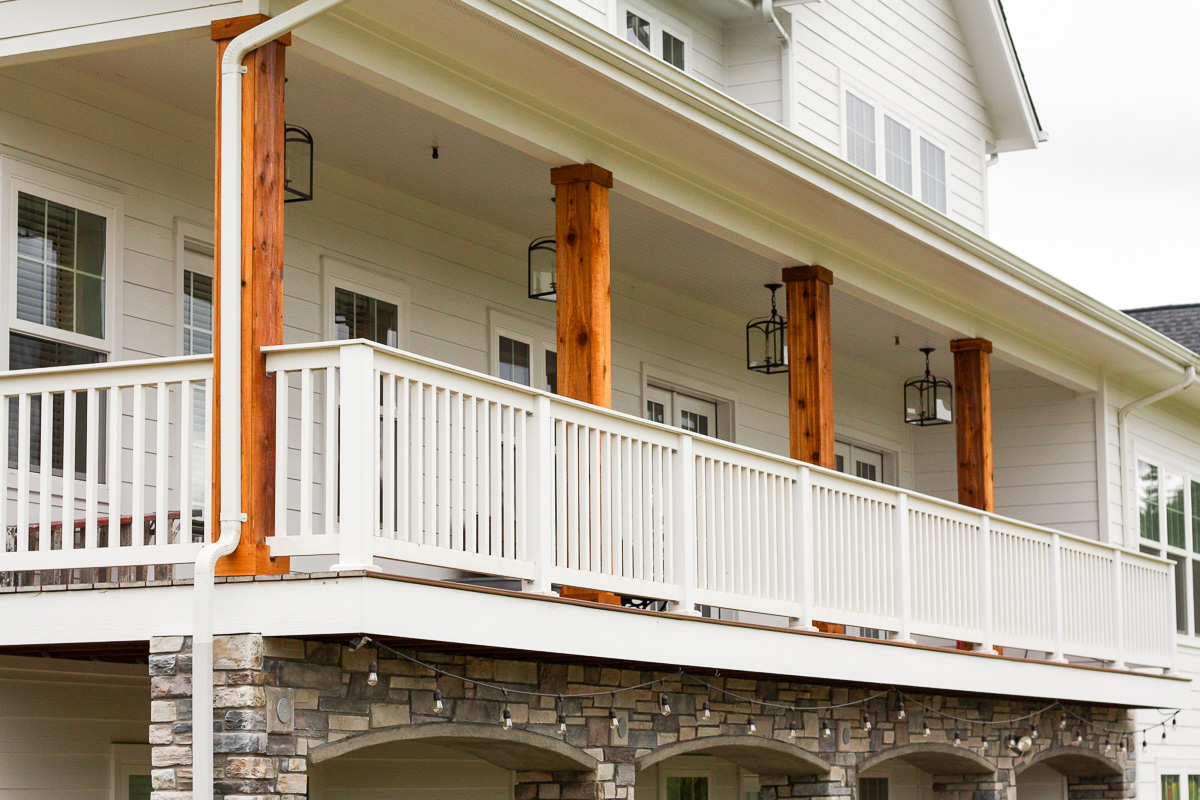
We bought a few cedar planks, took some measurements, and tested a few arrangements. After we determined that it would, indeed, be an easy fix, we bought the materials and hired a pro to stain and install the wood. It took a few weeks for him to finish all 19 cedar pillars, but we couldn’t be more thrilled with how they turned out! When I look at photos from before, I feel like the front of the house was unfinished.

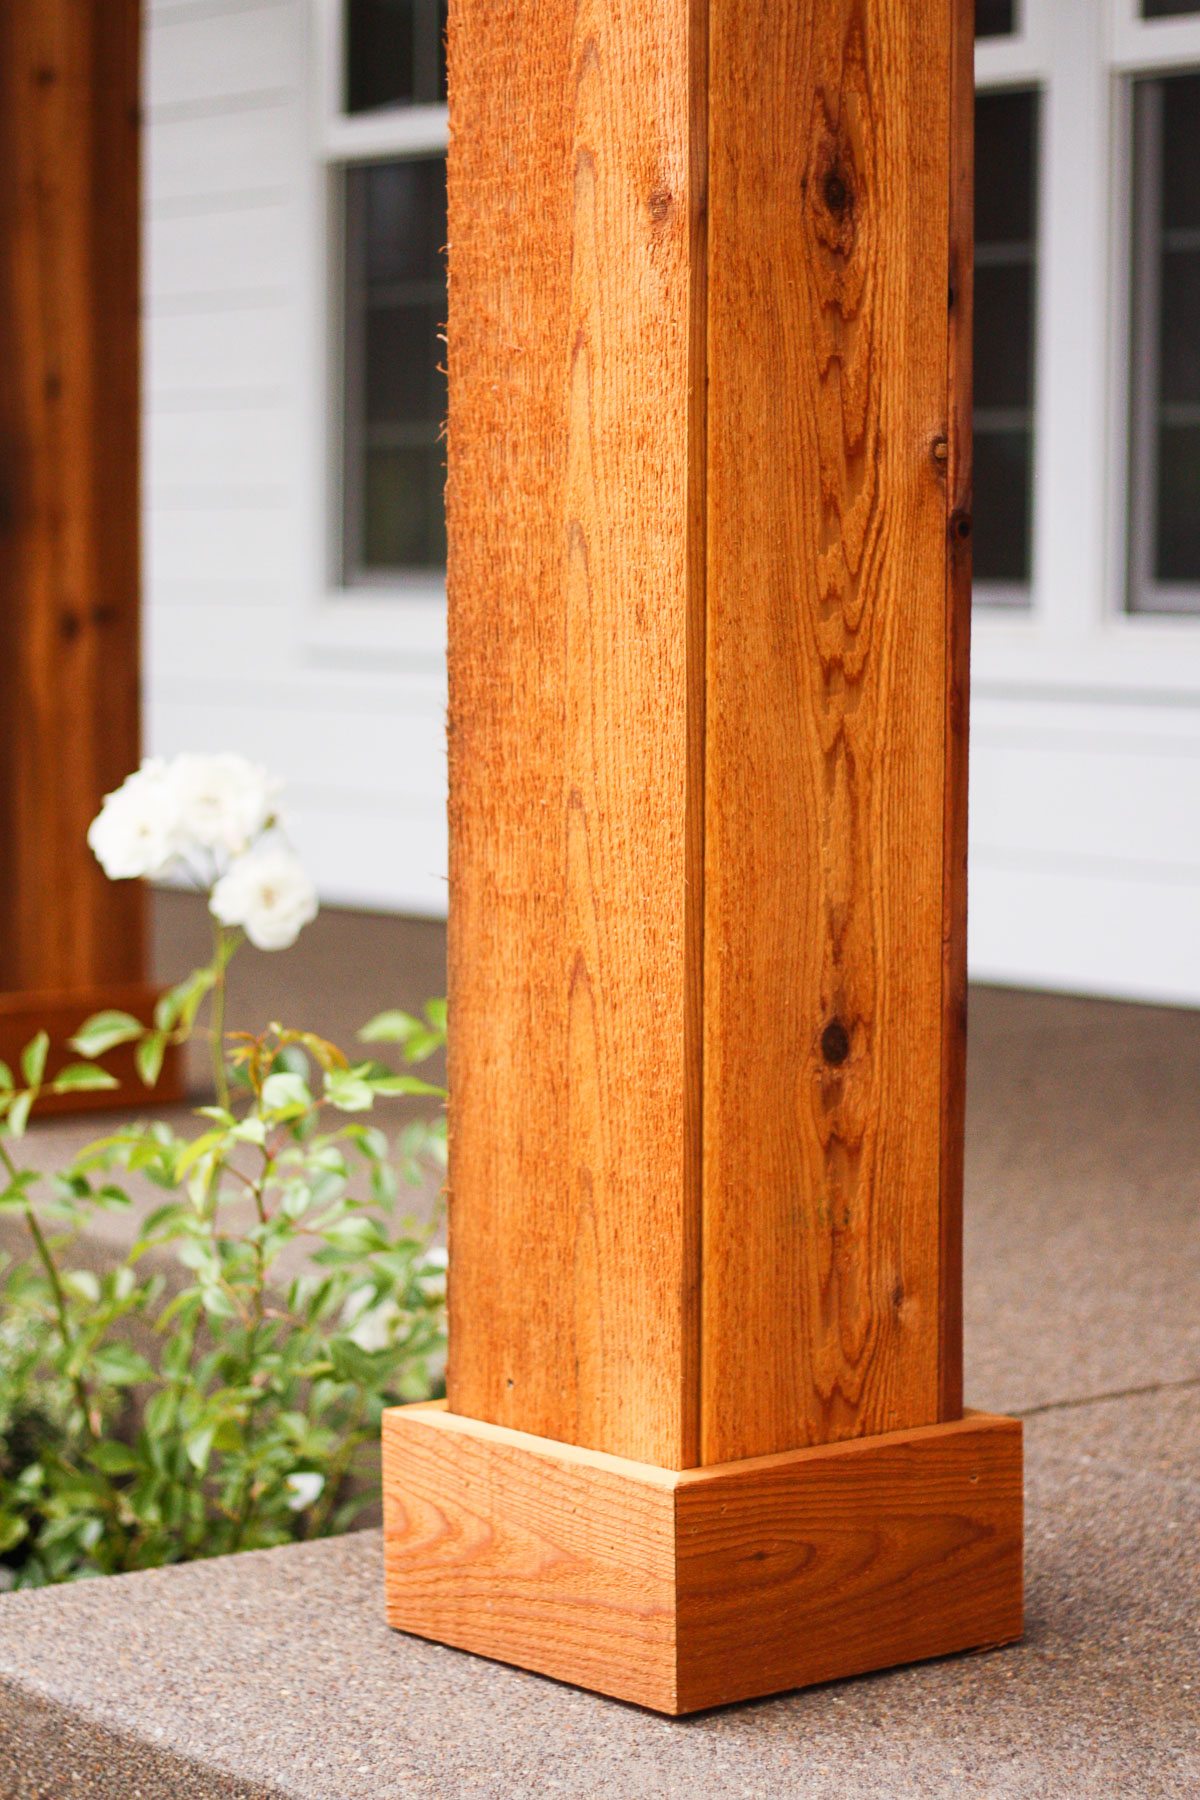
We bought 1″ unfinished cedar planks in widths of 7 1/4″ and 9 1/4″. The narrower planks are attached to the sides of the pillars, and the wider planks are attached to the front and back so that each pillar is square. We wanted to keep the project simple, so the corners of the pillars aren’t mitered. You can see a detailed shot in one of the pictures below.
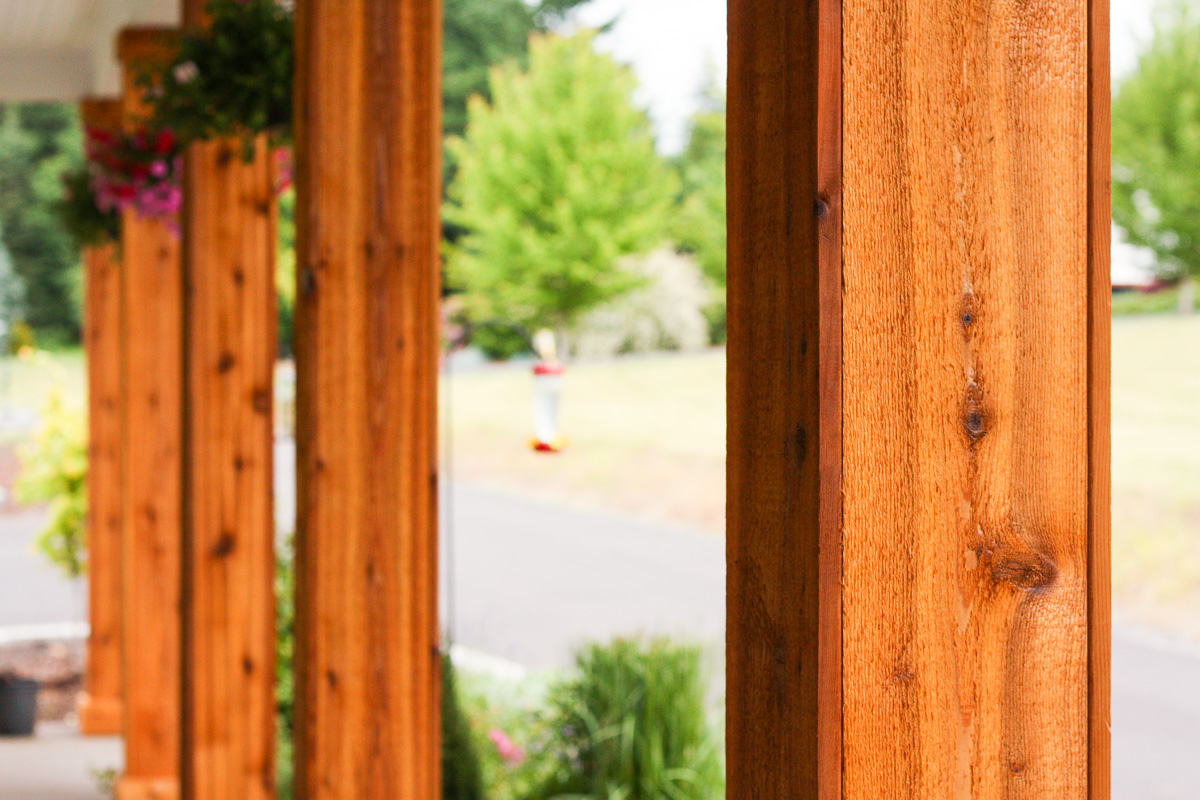
We wanted the pillars to be protected from the weather (cedar goes gray in the sun if you don’t treat it), but we didn’t want them to be that crazy red color a lot of stained cedar gets. By the way, they do look really red in some of these pictures, like the one above, but they aren’t that red in real life. We chose the clearest, most natural stain we could find, and I think the color is beautiful and really highlights the knots and grain of the wood. We used Duckback Superdeck Transparent Stain in Natural.
The only problem we ran into was at the top of each pillar where it connected with the porch beam. The beam doesn’t rest on top of the pillars, it rests inside little notches cut into each pillar. So our friend who installed the cedar cut similar notches in the cedar crown molding.

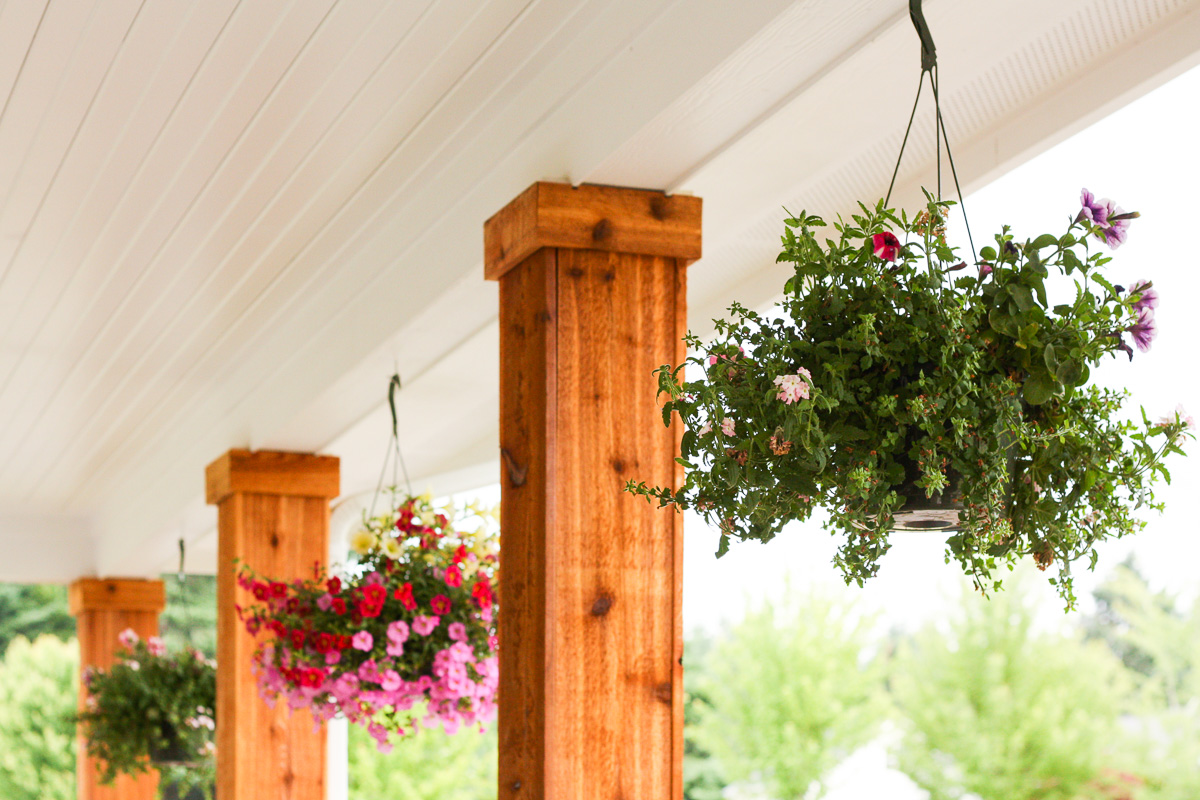
All in all, we love this latest update to the Dream House. The cedar pillars make the front (and back!) of the house look colorful and beautifully finished. And the mature landscaping doesn’t hurt either. I’m super happy with how nice all of the plants we put in last year look this summer.
Next on our list is a back patio slab to replace the gravel and weeds currently in the location. We’ve been meaning to do something with it for two summers and will hopefully get around to it this year. Wish us luck!


Melissa, it’s just as lovely as could be! And your landscape looks absolutely gorgeous, too.
Thanks, Amy! It’s amazing the difference a year makes on landscaping!
My wife would like me to do this on our house. I am having trouble finding reasonably priced cedar boards near me. Where did you purchase these boards and about how much did they cost?
Hi Jason. We got them from a local mill here in the Eugene, OR area. They are 3/4″ planks, half measuring 8″ wide and half measuring about 9.5″ wide so that they form a square when attached to the pillars. I can’t find the receipts or emails detailing the cost, but I’ll reply again if that changes.
Can you tell me what stain color you used?
Hi Marci! I have looked this up so many times, you’d think I’d remember at this point! I know it is Superdeck. I’ll check the color…
Yes, I’d like to know the color as well. Looks perfect!
Did you have time to look up that color stain of superdeck Marci ask?
Hi Bryan. Unfortunately, neither we nor the guy who installed the pillars for us remembers the exact color, and the label has been torn off the can. It is for sure DuckBack Superdeck Transparent Stain, and I think the color looks closest to Cedar Tone Natural. There are a few stain colors that look similar, so you might want to buy sample sizes and figure out which one you like best on your wood.
Hi Melissa! What did you do with the ceiling in the entrance to the home? Is that paint or stain? Everything looks great!
Hi Betsy! The barrel vault is made of clear cedar tongue and groove beams that are about 3 inches wide on the face. And we just mixed a couple of Minwax stains together until we got a color we liked!
Melissa,
I just came across your post and love what you did with the cedar wrapped posts. My question is, how much upkeep is involved? Do you have to reapply stain every year or is it a one-time application? Thank you!
Hi Valerie! They been up for just over two years now, and I noticed just a couple of weeks ago that where they get hit by sprinklers in the front yard, they should probably be restained. I haven’t noticed any significant wear on the pillars that don’t get sprinkler spray, or the parts above the spray line. I’m sure eventually they’ll all need another coat, just like a cedar fence would, but it should last a long time.
Your home is gorgeous. Could you tell me what width the trim board is on the top and bottom of you porch posts please? Thank you.
I just found your post ! Wow !! Gorgeous! Were the previous pillars wood or vinyl ? I have vinyl pillars and wondered if I could cover mine the same way ?
Hi! Before we covered them, our pillars were some kind of prefab, reinforced resin. Sorry if that’s not helpful! But I’m sure it would work exactly the same with vinyl pillars. Good luck!
Hi! What is the name of the white you painted the house?
Thanks!
Hi there! It’s Benjamin Moore Brilliant White.
Your house looks amazing. Would like to know the color paint of your front door. LOve how it looks with the White House and cedar posts.
Hi! It’s called Houseplant from Sherwin-Williams.
Your house is beautiful! We are putting up new posts very similar to yours. What is the width of the post caps?
Hi Kris! The caps at the tops of each post are about 3.5″ wide. Because we covered existing pillars, we just had to work around whatever parts they already had.
Where did you purchase your stain for the columns? They are beautiful!
Hi Rachel! It’s just Superdeck Transparent Stain in Natural. It should be very easy to find at hardware stores or Sherwin-Williams.
It’s beautiful, thinking of doing it on my porch. Is it still as beautiful?
Hi Tami! Yes, we still love them. When I see old pictures of the house before we added the cedar, it looks unfinished. We’ve restained them once since we first installed them.
Love these using yours plans to update ours thanks for sharing.
Indeed, the house looks much better and natural than before. Love how small touches change the looks in a dramatic way!
Hi melissa im womdering if this is the type of paint u used for the cedar post? And if not would it be possible for u to post a picture of the one used ..thank you in advance
https://www.homedepot.com/p/Ready-Seal-1-gal-Natural-Cedar-Exterior-Wood-Stain-and-Sealer-112/204372083?source=shoppingads&locale=en-US&pla&mtc=SHOPPING-BF-CDP-GGL-D24-024_011_EXT_STAIN_WS-NA-Multi-NA-PLALIA-NA-NA-NA-NA-NBR-NA-NA-NA-FY21_Exterior_PLALIA&cm_mmc=SHOPPING-BF-CDP-GGL-D24-024_011_EXT_STAIN_WS-NA-Multi-NA-PLALIA-NA-NA-NA-NA-NBR-NA-NA-NA-FY21_Exterior_PLALIA-71700000075828152-58700006498658431-92700058687514990&gclid=EAIaIQobChMIlNWj0Ln7_wIVk_zjBx3Y_wDXEAQYDyABEgINmfD_BwE&gclsrc=aw.ds
Hi Alvin. That product looks similar to the one we used. We used Superdeck Transparent Stain.
Thank you for responding over so many years! I love this, too, and have only 4 pillars. What size were your pillars? I like the size, 8″ & 9.5″ you used, but am trying to compare to what it was. Mine are only 5.25″, but I would like to compare your before and after. Great job!!
It’s been so long that I don’t remember the exact dimensions of the pillars before, but there’s no empty space between pillar and cedar. So the pillars underneath must be around 8″?? Two cedar panels go just exactly to the edges of the pillars underneath, and then the other two cedar panels cover the pillars on their side plus the raw edges of the cedar from the other two sides. If that makes sense!