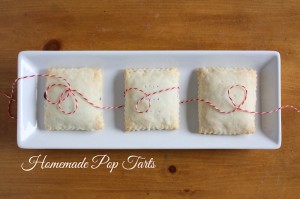
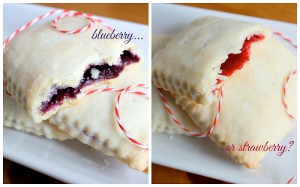
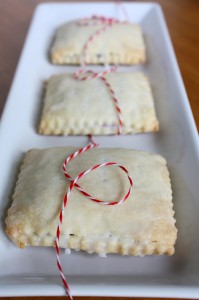
I think I’m safe in saying that Pop Tarts are universally loved. Even if you have sworn off junk food and only eat things made from scratch using ingredients you’ve harvested from the land, you have to admit that a Pop Tart is one of life’s simple pleasures! Well rejoice, people of the world, because I can tell you from experience now that homemade pop tarts are easy and delicious. The jammy filling only takes a few minutes to make and is tangy and sweet, and the buttery, flaky crust is a snap to make in the food processor. I’m glad my kids couldn’t finish theirs at breakfast this morning!
Homemade Pop Tarts
The recipe for the crust comes from my friend Heidi. She made chocolate cream pie bites for book club once, and I admit, I ate almost all of them myself!
for the filling:
1 Tablespoon cornstarch
1 Tablespoon water
1 dry pint fruit
1 Tablespoon fresh lemon juice
1/4 cup sugar
for the crust:
2 2/3 cups flour
1/4 teaspoon salt
1 cup cold butter, cut into cubes
8-10 Tablespoons ice water
for the glaze:
2 cups powdered sugar
1/3 cup milk
To make the filling, combine cornstarch and water in a small bowl. Whisk with a fork until smooth, and set aside. Puree fruit until smooth using a food processor or blender. In a large, heavy-bottomed saucepan, combine fruit puree, lemon juice, and sugar. Heat over medium-high until boiling, stirring constantly. Boil for 5-6 minutes until thick and syrupy. While stirring, slowly add cornstarch mixture and beat with a spoon (or whisk) until completely combined. Continue boiling for 2 more minutes until filling is about as thick as pudding; when you drag a wooden spoon across the bottom of the pan, you should be able to see the pan for a moment before the fruit mixture fills in the space. Remove from heat and cool completely.
To make the crust, pulse flour and salt in the bowl of a food processor until combined. Add butter chunks and pulse just until butter is in pea-sized clumps. Slowly add cold water and run food processor just until dough comes together in one mass. Place dough on a well-floured surface and roll into a large rectangle 1/8″ thick. Cut dough into 16-20 3×3″ squares. If necessary, squish the dough scraps together and re-roll them. Place a Tablespoon of filling in the middle of half of the squares. Dip your finger in water and run it around all 4 edges of the squares with filling on them, then top each one with a plain dough square to make 8-10 little square pop tarts. Gently press the edges together to seal shut. Using a fork, poke several holes in just the top crust of each pop tart. Place on a parchment-lined baking sheet and refrigerate while the oven heats to 400°F. Bake for 20-25 minutes until golden. Remove from oven and place on a cooling rack to cool completely.
While pastries are cooling, combine powdered sugar and milk in a medium bowl. Whisk until smooth. When pastries are cool, drizzle glaze over the top and allow glaze to set.

Looking foward to using this crust recipe on all future pies! It came out great using my kitchen aide mixer. Thanks for sharing!
Isn’t it delicious?! I got it from my friend Heidi, and I don’t plan on using anything else ever again!
these are adorable and look so yummy! i cannot wait to try them out!
Thanks Sarah! I ate more than my share and was sad when they were gone!
Can I use frozen blueberries and if so how much?
I’m sure frozen blueberries would work. Use 2 cups.
OK friend. Pop tarts are something I love but haven’t allowed myself on years. The brown sugar ones were always a favorite. Any ideas on how to make that filling? I’m thinking maybe a brown sugar slurry like for sticky buns.
That’s my favorite flavor too! I’ll have to buy a package and do some “important research.” I think brown sugar and spices are on the right track.
How long do these last? Is it possible to make them in bulk and then freeze them do you think?
Hi! Sorry I didn’t respond to your comment sooner; we were on vacation last week! Once baked, I would say they last 2 days at the most. But I’m sure you could make them ahead and freeze them. I’m thinking you could freeze them before baking, then bake them straight out of the freezer for a longer than the usual 25 minutes. That’s a guess! If you try it, let us know the results!