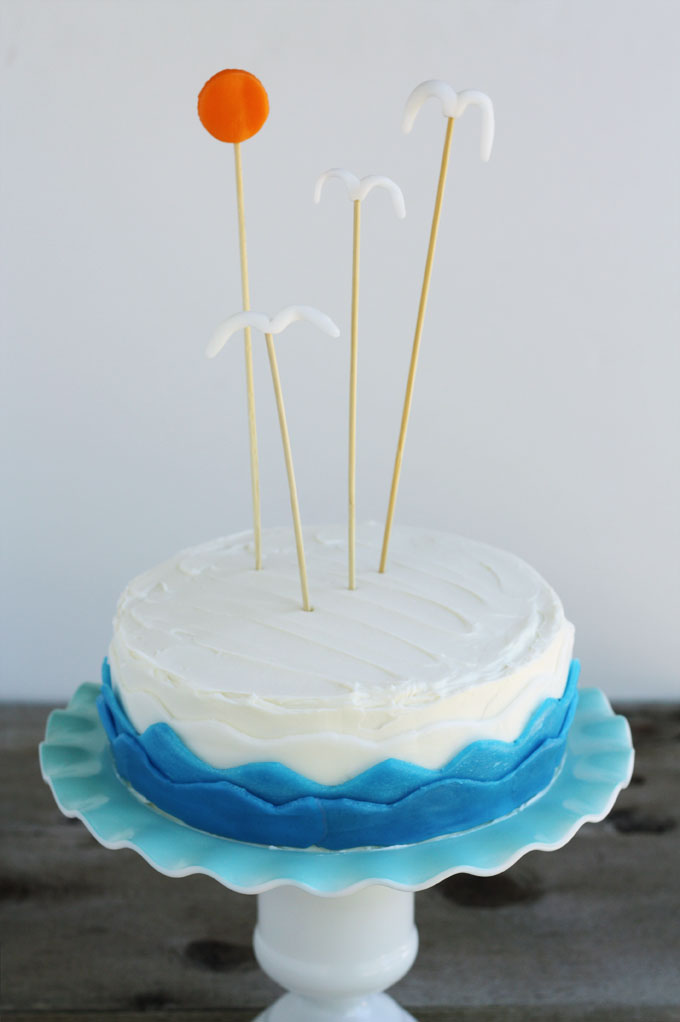
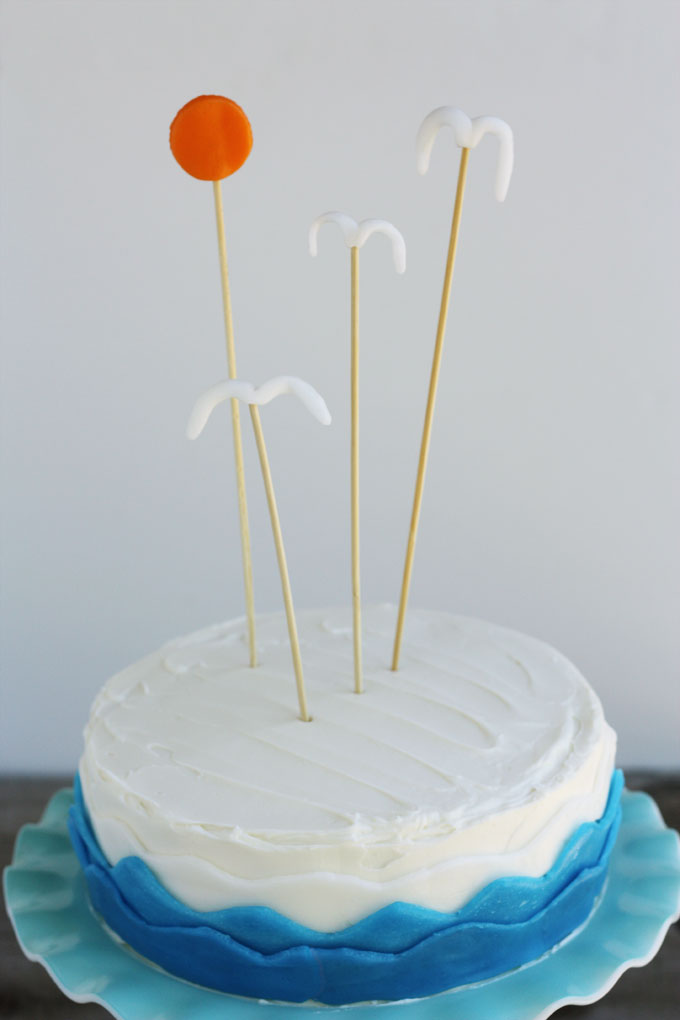
I’m so excited to share this gorgeous cake with you guys today! Airheads asked me a few months ago to create a fab tutorial using their candy, and I wanted to do something beachy and summery–an ocean-inspired cake! Airheads are so great for edible crafts because you can mold them and shape them and use cookie cutters on them; they’re basically like really delicious edible clay!
Materials & Tools
an 8″ round 2-layer cake with white frosting
8 blue airheads
10 white airheads
1 orange airhead
4 long bamboo skewers
waxed paper or freezer paper
rolling pin
a small circular cookie cutter
a sharp paring knife
Steps
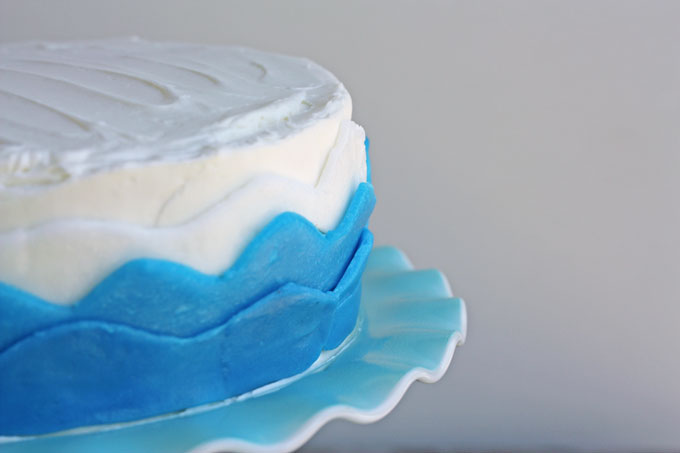
1. It takes 6 Airheads to have enough to go around an 8″ layer cake. Place 6 white Airheads side-by-side on a sheet of waxed paper or freezer paper. Heat for 8-10 seconds in the microwave to soften them up a bit. Gently lay the Airheads in one long row on the waxed paper, end-to-end, overlapping just a few millimeters. Place another piece of waxed paper on top, and roll lightly with a rolling pin to flatten them a bit and help them stick together. Remove the top sheet of waxed paper and use the paring knife to cut the strip into a squiggly wave shape. This can be kind of tricky, and for me, was successful about half the time. So if it isn’t working very well, cut sharp zigzags instead, and use your fingers afterward to soften any pointy parts and round them out. Carefully wrap the strip of white Airhead waves around the cake. Place the bottom of the strip about 1 inch above the cake plate or serving platter.
2. Repeat the steps above with 4 white Airheads and 2 blue Airheads. The only difference is that you need to mix the colors together before rolling them into a long strip. After microwaving the Airheads for 10 seconds, knead them together until well-mixed. Roll the Airheads into a long, skinny snake, then sandwich between waxed paper, flatten, and continue with the directions above. When you are ready to attach the light blue Airhead waves to the cake, place them just below the white strip, but overlapping a bit. You don’t want the bottom of the white strip to show.
3. Repeat the steps again with 6 blue Airheads. When you are ready to attach the blue Airhead waves to the cake, line up the bottom of the strip with the bottom of the cake. With any luck, it will end up just below but slightly overlapping the light blue strip above it.
4. Take 3 scraps of white Airheads, roll them into skinny snakes about 2 inches long and as big around as a pencil, shape them into generic V-shaped seagull shapes, and poke each one onto a bamboo skewer. Place all 3 on the cake, varying the height as desired. I snapped a couple of inches off the bottom of two of my skewers to make them a little shorter.
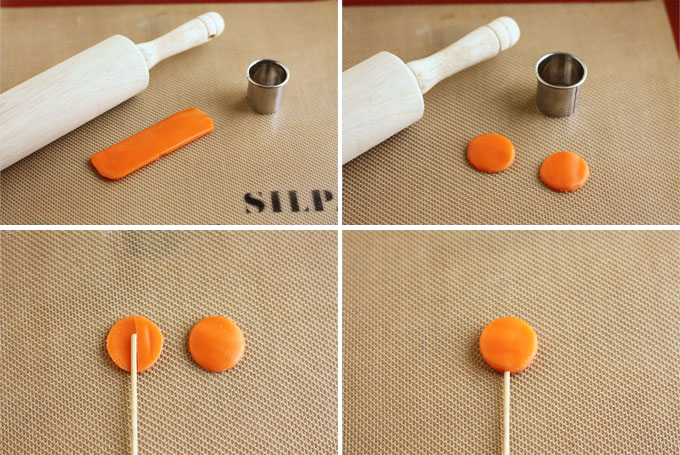
5. Place the orange Airhead on a sheet of waxed paper, microwave for 8 seconds, cover with another sheet of waxed paper, and flatten until it is the same width as your small circle cookie cutter. Cut out two circles, sandwich your last bamboo skewer between them, and place your “sunshine” on the top of your cake!
Now, a couple of notes about this cake. First note: it is pretty darn good looking, but with any kind of heat or humidity, it won’t stay that way for long. Everything will start to droop and look sad. So serve the cake immediately, or refrigerate it until ready to serve. If you do put it in the fridge, there’s no way you’ll be able to cut through the candy to serve the cake, so after everyone gets a good look at it, take the Airheads off and slice your cake as usual. Second note: you might say to yourself, “Hey, self, those two blue layers don’t look very different to me. Why bother?” I thought mixing equal numbers of blue and white airheads would work, but it didn’t change the color as significantly as I wanted. And I was out of airheads at that point. So in the directions, I’ve increased the ratio of whites to blues in that layer, and yours should turn out lighter than mine did. FYI. 🙂
Disclosure: This post is sponsored by Airheads and, as such, I received compensation for it. All ideas, photographs, and opinions are my own.

Such a good idea! Love how it turned out!!
Thank you! I’m so thrilled that it turned out the way I pictured it in my mind!
Such a wonderful post. I had never tried this type of cake decoration . I appreciate you for this post. And waiting for next delicious post.