Oreos on a stick might not seem that special; they certainly aren’t that different from Oreos that aren’t on a stick! But there’s just something about them that is really cute. And really tasty in that I-know-this-is-not-the-least-bit-healthy kind of way. And food on a stick is always more fun to eat, right?!
Instead of doing a regular ol’ recipe, I figured I’d do a little tutorial. It just seems to call for it.
1 package double-stuffed Oreos (the regular ones aren’t thick enough)
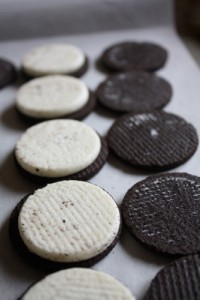 |
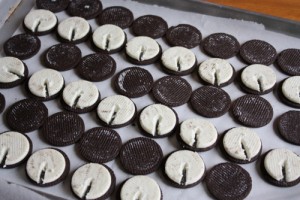
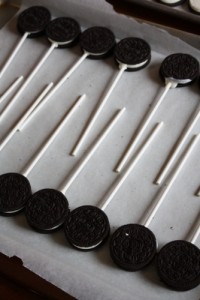
| See how I crowded them? Don’t do that! |
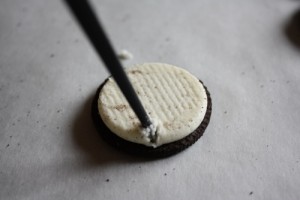
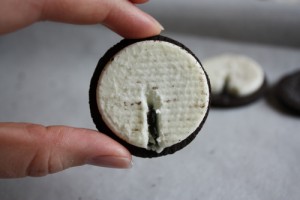
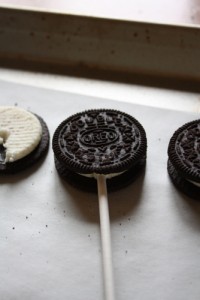
2. Using the end of a chopstick or a skewer (I actually used the end of a beater last time), dig a little channel in the cream filling on each Oreo. If you start at the edge and gently work toward the middle (instead of starting in the center and moving outward), you won’t randomly lose big chunks of filling.
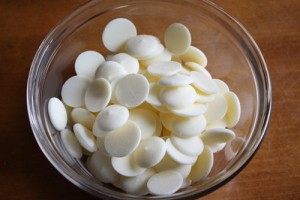
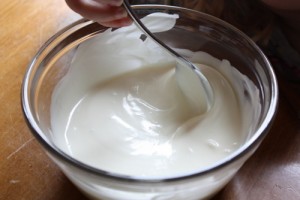
3. Put your candy melts in a microwave-safe bowl. In this case, tall and narrow is better than short and wide. Think measuring cup, not pie plate. Melt them according to package directions.
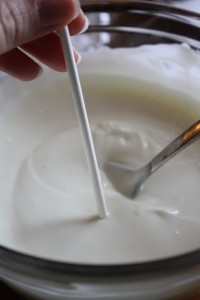
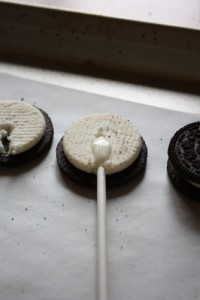
4. Dip the end of a lollipop stick in candy and set it in one of the Oreo cream filling channels you dug in step 2. Gently push it all the way in and all the way down. Gently! If you push too hard, the Oreo will break. If you do break an Oreo, see the “Tips” below for some…tips.
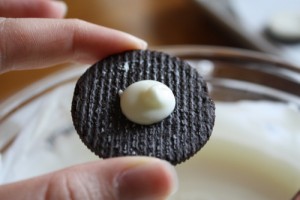
5. Take an Oreo top, spoon a tiny bit of candy onto the blank side (dime-sized at the most), flip it over, and put it back onto its mate.
6. Repeat steps 4 and 5 with the rest of the Oreos and sticks, and let them sit until completely set.
7. If the candy melts need a quick reheat before moving on, feel free to microwave them again briefly.
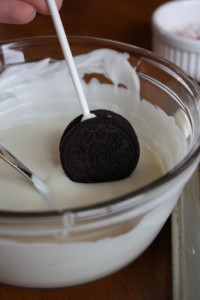
8. Take an Oreo Pop and dip it in candy until it is completely covered. You might need to tilt your bowl and kind of roll or swish the Oreo Pop around to get it covered. Once it is completely covered, hold it parallel to the table and gently tap the stick against the side of the bowl so that the excess candy coating drips back into the bowl. If you make sure to hold the Oreo Pop flat while doing this, any unevenness on the front will smooth itself out. And the back might look like a mess, but no one will see it.
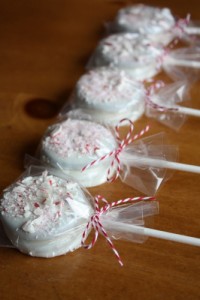
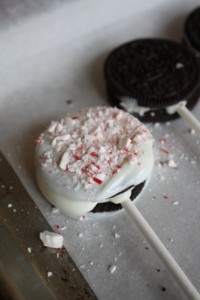
9. Set the dipped Oreo Pop on it’s back on one of the prepared cookie sheets and sprinkle with crushed candy canes. Allow to set.
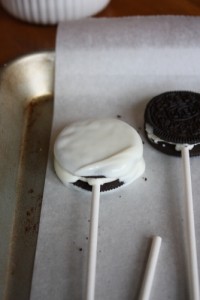 |
| Er, it should actually be completely covered |
10. Repeat steps 8 and 9 with remaining Oreo Pops.
11. When they’re all dry, wrap them up however you like! Or just eat them yourself; that works too!
- Depending on how successfully you split the Oreos and how many broken ones you find in your package, you can get up to 30 Oreo Pops from this recipe. If you need exactly 30, I would definitely buy two packs of Oreos just to be safe.
- You can obviously make them with any color candy melts you want, and you can substitute sprinkles for the crushed candy canes. So far, I like the light blue candy melts the best. They melt well and cover well, and they’re a pretty Tiffany blue.
- I used white candy melts this time, but I’ve also used white almond bark. The almond bark is slightly more difficult to work with, but it covers extremely well, so you can’t see any Oreo through the candy coating.
- If at any point you break an Oreo, never fear! If you break it pretty cleanly into two large pieces (which, based on my scientific research, is generally the way Oreos break), just piece them back together and glue them with melted candy. Allow to dry completely, then proceed. You do end up dunking the entire set-up in candy, so no one will ever know it was broken.
- For the wrapping above, I used 3×4-inch clear cellophane treat bags by “Celebrate It” from Michaels. I thought they’d be too small, but they are the perfect size. I’ll definitely use them from now on. I also used Maraschino baker’s twine from The Twinery.

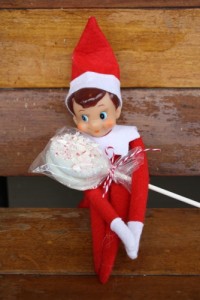

thanks for sharing this recipe! I made them last night and they turned out great. Jackson is so excited to take them for his friends at preschool!
Cute! Can I have one please? 🙂
I can’t believe Jackson is in preschool!! Ellie took her’s to preschool yesterday and they were a big hit. Merry Christmas to your sweet family!
Sorry, Zee. We ate them all already! They go super quickly around here!
They are sooooo pretty! I was going to do cakepops for my sister’s shower but I think Tiffany blue oreos would be perfect. Thank you for the tutorial it’s terrific!
The blue ones I made have been my favorite so far! We did light blue candy melts and little white sprinkles. They were adorable and would be perfect for a shower!
Love it! Can’t wait to make these with kids:) Tastefully SoSo http://www.soosootasty.blogspot.com
A very fun project to do with kiddos. Have fun!
Cute! Great idea for Christmas. Looks easy too 🙂
Hi Chelsea. They are pretty easy, especially if you can talk a few friends into helping out!
When you say 1.5 bags of candy melts, is that a 12 oz. bag that you’re referring to? I’m planning to make these as a favor for my December 21st wedding 🙂
Hi Renee. I have NO idea off the top of my head how big the bag of candy melts is. I just used the bags of Wilton’s candy melts from either JoAnn’s or Michael’s if that helps. Next time I’m at either of those stores I’ll check and update you. Congrats by the way!
How long do these stay fresh?
Hi! When I’ve made these, it has always been for functions that were within a week and they were wonderful. I think the candy coating seals in the freshness of the cookies!
They are really cute. Can’t wait to try them for the grand kids.
They’ll be a big hit Val, and will make you a very popular grandma!
Wow, I love them, but we don´t have these double oreos in Germany
Thanks fpr sharing
Martina
Martina, you could still use the regular oreos …make the channel and
just add a thicker layer of the chocolate in the inside. They will be
perfect .. you can also add some finely crushed nuts to the inside filling
with the chocolate, gives these another, very tasty, dimension!
When I do this I add a drop or two of pepperment oil in to the melted chocolate and add some crushed candy to the
filling of the cookie before I dip them…This is great adds more peppermint taste to them..
Sounds delish!
what an excellent, and pretty simple idea ~ I think I’ll make these as favors for my granddaughter’s halloween b-day party (with orange coating and black, purple & green sprinkes) and then make them again as favors for our annual Christmas Party this year!!! Thanks for the idea, and tutorial!!
You are welcome Lauren! They are so much fun to make, and look so adorable when they’re done. You wouldn’t think one Oreo would be enough of a treat for anybody, but when they’re so cute, they make a really big impression!
oh Lulu!! I can’t wait to make these. I tried before, but didn’t know your awesome tricks, and mine were a complete fail!! now I know what I”m making for Neighbor gifts! xoxoxo
They are so easy and so cute, they’d be perfect for neighbor gifts! I’m glad I could help! 😉
Hello, I’m new here but just wanted to say how much I loved your tutorial! I love peppermint, especially with chocolate, so I can’t wait to try these yummy-looking confections. What I appreciated about your tutorial is that you left no questions in my mind about the process – from beginning to end. I love detailed instructions because otherwise I can get easily confused. 🙂 You covered all the bases, even including how to use the broken cookies. Can’t wait to browse the rest of your blog and follow your future posts! Thank you and blessings!
Mai, I’m so glad that the tutorial works for you! I had seen lots of pictures of Oreos on sticks, but couldn’t find a good tutorial anywhere. So I made one! You’d think there wouldn’t be too much to making Oreos on a stick, but they do take some finesse!
These are great, i use almond bark instead of chips they go a lot futher, and add coloring (if wanted colored and a touch of flavor) depends on holiday. they look great when making candy gifts for holidays.
They do make fantastic gifts! We gave them to the kids’ school teachers last year and they LOVED them!
So cute. I’m making these for sure.
I’m thinking of making them again; they are just so cute!
What a great idea Lulu. I have been looking for something to make as a treat for the kids at school. (I need to make 80 altogether.)
PS Brilliant instructions too.
I’m glad the instructions worked for you! I’m usually not into step-by-step photos with recipes, but this really needed it. Happy Holidays!
How long does it take to set?
I made these last night for my daughter’s preschool class. Such a cute little treat. Thanks for sharing.
I hope the little ones loved them! Merry Christmas!
These are so stinking cute!!! Im trying them out on my husbands fire station first to see what the guys think 🙂 They always ask for cakes, but maybe these will knock their socks off! Thank you!!!
I think these will definitely knock their socks off!
wow love this idea and it comes with a tutorial too that is a bonus ejjeje.. i hope u dont mind but i would like to add it to my site as a christmas cookie gift idea and will include link to your site.. thanks for sharing..
Of course! Merry Christmas!
Thanks so much for the easy to follow instructions for these oreo pops. I just made them for my son’s 4th grade class Christmas party for tomorrow. They look great…so pretty. I plan to make more for Christmas eve too.
They really do look impressive!
Not long…30 minutes at the most.
Thanks for the great idea and easy to follow instructions! I made these to give away and everyone loved them! Was leary on how hard it really would be but was so surprised at the ease of the whole process.!!
It does seem like so much work, but it goes really quickly and they look so cute when you’re done–I’m glad everyone loved them!
Can you use baking chips are they the same as melting chips?
I would NOT recommend baking chips. They are not designed to melt smoothly and are so much harder to work with. If you want chocolate-covered Oreos, I’d use chocolate bark or a high-quality eating chocolate (Ghirardelli or Lindt); for white I’d use white candy melts (craft store or Walmart) or white almond bark; and for colored Oreos I’d use colored candy melts.
I just finished making these, and they turned out amazing. I did break a few Oreos in the process, but learned to slowly twist them apart. for the candy melts, I cheated using 1 bag white chocolate melts and 1 bag peppermint melts from Michael’s. This way I could eliminate the candy cane mess
Good idea to use peppermint candy melts!
These are great! Thanks so much for your step by step pictures; that made it so easy to follow.
You’re welcome, Anne!
I couldn’t find these instructions when I went to make these, so I just dipped them with toothpicks (they obviously weren’t lollipops anymore). I also was able to find peppermint crunch baking bits so I used those instead of crushing the peppermints. They ended up great and taste just like Thin mints! Yummy!!
Sorry you couldn’t find the instructions, but it sounds like they turned out great anyway! It’s hard to mess up oreos and mint!
I just saw this via Pinterest. I love it! I’m definitely going to make these just for fun
Hi Tan! They’re even better than you think they’re going to be. Which is fantastic!
Thank you for this clever tutorial. I’ve seen the oreo’s pops all over Pinterest and wanted to make some but they kept braking so at the end I gave up. But i know what to do next time. Brilliant!
Would it taste good if you just make it with the white chocolate and not peppermint? I don’t care for peppermint.
Sure! They’ll just be really rich (and delicious!).
So clever! Festive yet simple.
Could I gently urge us all to figure out a way to avoid using plastic?
I know the reality of hygiene prevention is a nightmare but, truly, our over use of plastics and filling the landfill is worse.
I honestly don’t have a perfect answer myself. I do use paper bags for presents like these – the paper bags can be thin and white but of course not transparent. At bake sales I have my students keep a couple of treats on display with the rest in the paper bags for selling.
I have made these before, but I love the pictures and taking the tops off. That is a great idea. I also like to use chocolate wafers. And instead of candy canes I put on mini M&Ms.
Can these be frozen?
Hi Tracy! I’m not sure if they can be frozen; I’ve never tried. If you just like frozen oreos, then I’m sure you could give it a shot. If you’re trying to make them ahead of time and get them to last longer, the candy coating actually keeps them fresh for quite a while.