Oreos on a stick might not seem that special; they certainly aren’t that different from Oreos that aren’t on a stick! But there’s just something about them that is really cute. And really tasty in that I-know-this-is-not-the-least-bit-healthy kind of way. And food on a stick is always more fun to eat, right?!
Instead of doing a regular ol’ recipe, I figured I’d do a little tutorial. It just seems to call for it.
1 package double-stuffed Oreos (the regular ones aren’t thick enough)
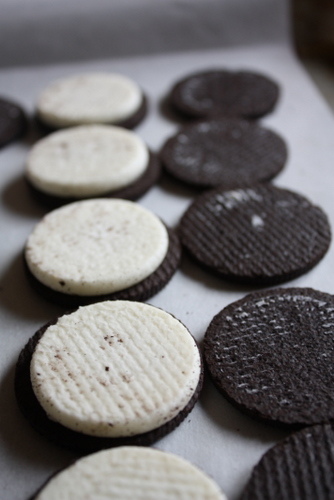 |
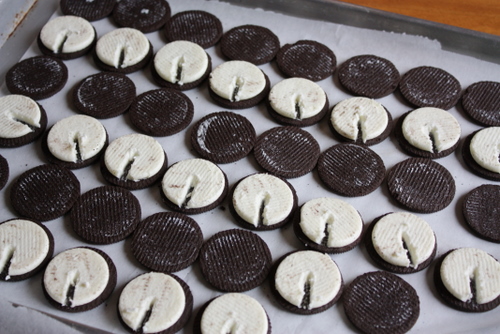
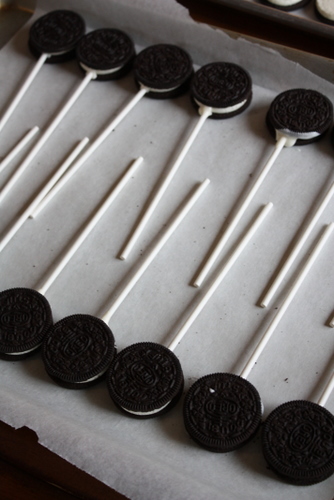
| See how I crowded them? Don’t do that! |
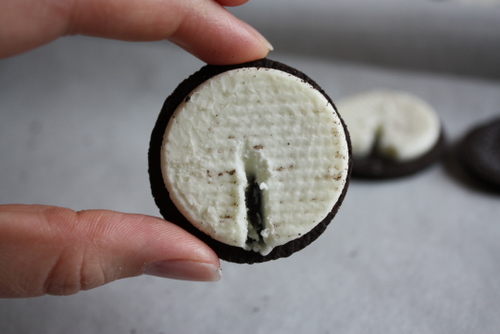
2. Using the end of a chopstick or a skewer (I actually used the end of a beater last time), dig a little channel in the cream filling on each Oreo. If you start at the edge and gently work toward the middle (instead of starting in the center and moving outward), you won’t randomly lose big chunks of filling.

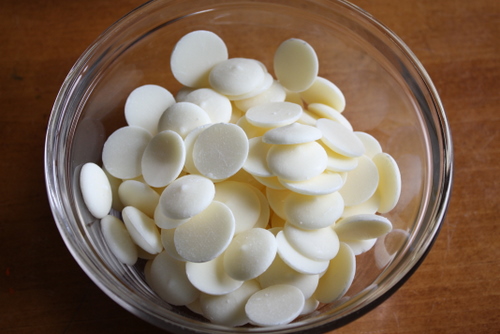
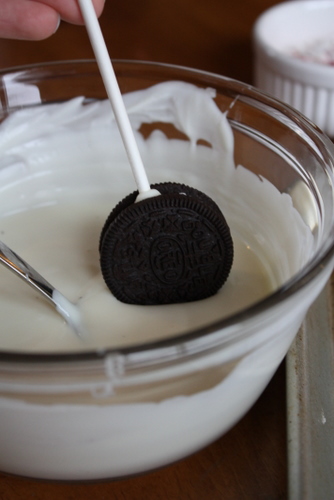
3. Put your candy melts in a microwave-safe bowl. In this case, tall and narrow is better than short and wide. Think measuring cup, not pie plate. Melt them according to package directions.

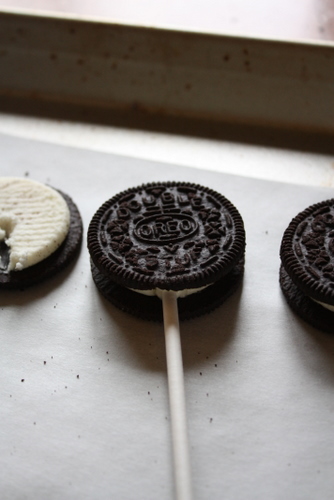
4. Dip the end of a lollipop stick in candy and set it in one of the Oreo cream filling channels you dug in step 2. Gently push it all the way in and all the way down. Gently! If you push too hard, the Oreo will break. If you do break an Oreo, see the “Tips” below for some…tips.


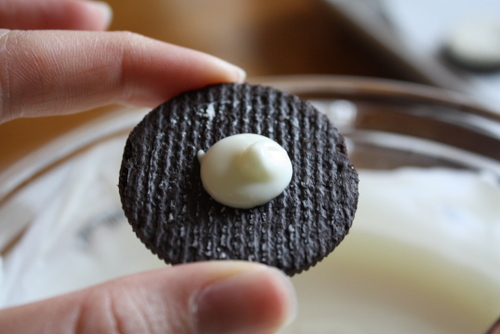
5. Take an Oreo top, spoon a tiny bit of candy onto the blank side (dime-sized at the most), flip it over, and put it back onto its mate.
6. Repeat steps 4 and 5 with the rest of the Oreos and sticks, and let them sit until completely set.
7. If the candy melts need a quick reheat before moving on, feel free to microwave them again briefly.
8. Take an Oreo Pop and dip it in candy until it is completely covered. You might need to tilt your bowl and kind of roll or swish the Oreo Pop around to get it covered. Once it is completely covered, hold it parallel to the table and gently tap the stick against the side of the bowl so that the excess candy coating drips back into the bowl. If you make sure to hold the Oreo Pop flat while doing this, any unevenness on the front will smooth itself out. And the back might look like a mess, but no one will see it.
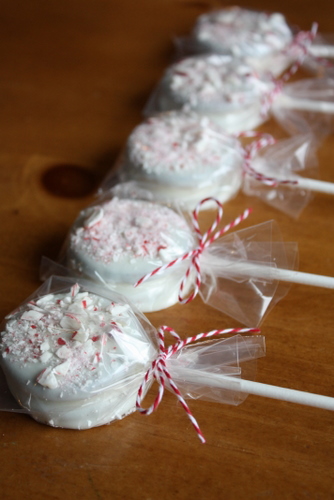
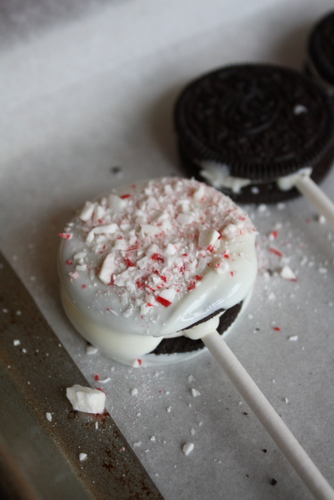
9. Set the dipped Oreo Pop on it’s back on one of the prepared cookie sheets and sprinkle with crushed candy canes. Allow to set.
 |
| Er, it should actually be completely covered |
10. Repeat steps 8 and 9 with remaining Oreo Pops.
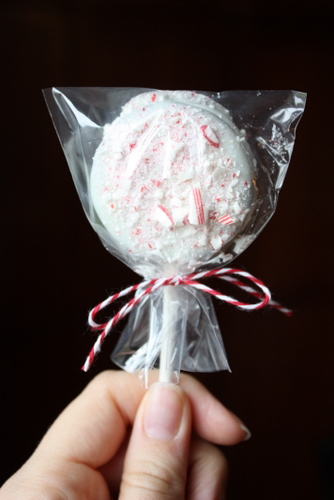
11. When they’re all dry, wrap them up however you like! Or just eat them yourself; that works too!
- Depending on how successfully you split the Oreos and how many broken ones you find in your package, you can get up to 30 Oreo Pops from this recipe. If you need exactly 30, I would definitely buy two packs of Oreos just to be safe.
- You can obviously make them with any color candy melts you want, and you can substitute sprinkles for the crushed candy canes. So far, I like the light blue candy melts the best. They melt well and cover well, and they’re a pretty Tiffany blue.
- I used white candy melts this time, but I’ve also used white almond bark. The almond bark is slightly more difficult to work with, but it covers extremely well, so you can’t see any Oreo through the candy coating.
- If at any point you break an Oreo, never fear! If you break it pretty cleanly into two large pieces (which, based on my scientific research, is generally the way Oreos break), just piece them back together and glue them with melted candy. Allow to dry completely, then proceed. You do end up dunking the entire set-up in candy, so no one will ever know it was broken.
- For the wrapping above, I used 3×4-inch clear cellophane treat bags by “Celebrate It” from Michaels. I thought they’d be too small, but they are the perfect size. I’ll definitely use them from now on. I also used Maraschino baker’s twine from The Twinery.


I just saw this via Pinterest. I love it! I’m definitely going to make these just for fun
Hi Tan! They’re even better than you think they’re going to be. Which is fantastic!
Thank you for this clever tutorial. I’ve seen the oreo’s pops all over Pinterest and wanted to make some but they kept braking so at the end I gave up. But i know what to do next time. Brilliant!
Would it taste good if you just make it with the white chocolate and not peppermint? I don’t care for peppermint.
Sure! They’ll just be really rich (and delicious!).
So clever! Festive yet simple.
Could I gently urge us all to figure out a way to avoid using plastic?
I know the reality of hygiene prevention is a nightmare but, truly, our over use of plastics and filling the landfill is worse.
I honestly don’t have a perfect answer myself. I do use paper bags for presents like these – the paper bags can be thin and white but of course not transparent. At bake sales I have my students keep a couple of treats on display with the rest in the paper bags for selling.
I have made these before, but I love the pictures and taking the tops off. That is a great idea. I also like to use chocolate wafers. And instead of candy canes I put on mini M&Ms.
Can these be frozen?
Hi Tracy! I’m not sure if they can be frozen; I’ve never tried. If you just like frozen oreos, then I’m sure you could give it a shot. If you’re trying to make them ahead of time and get them to last longer, the candy coating actually keeps them fresh for quite a while.