 photo by Brooke Dennis
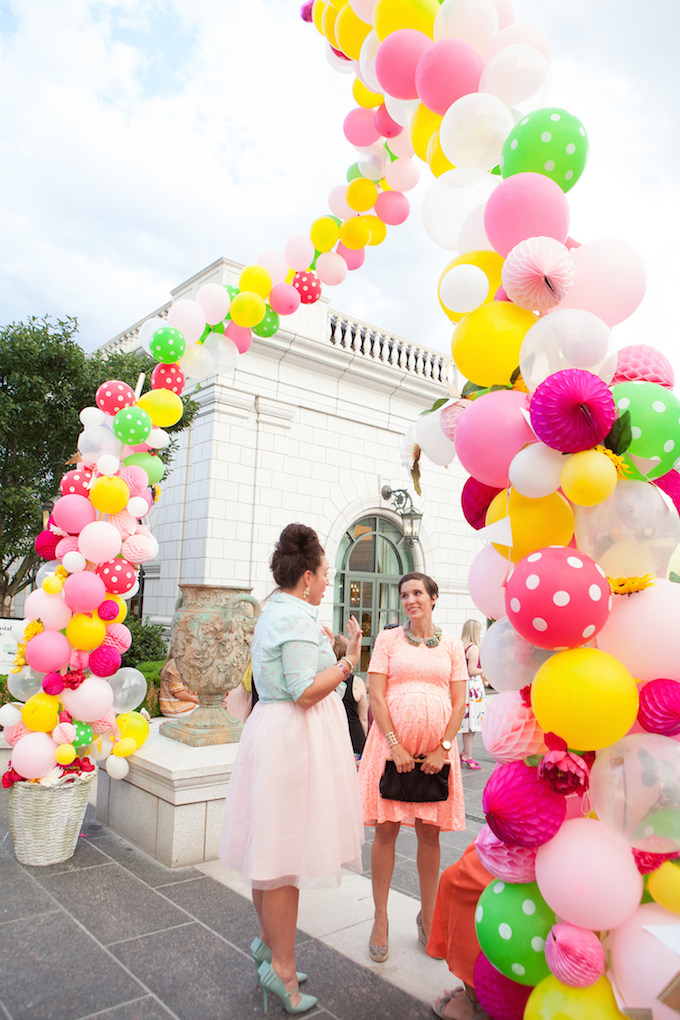
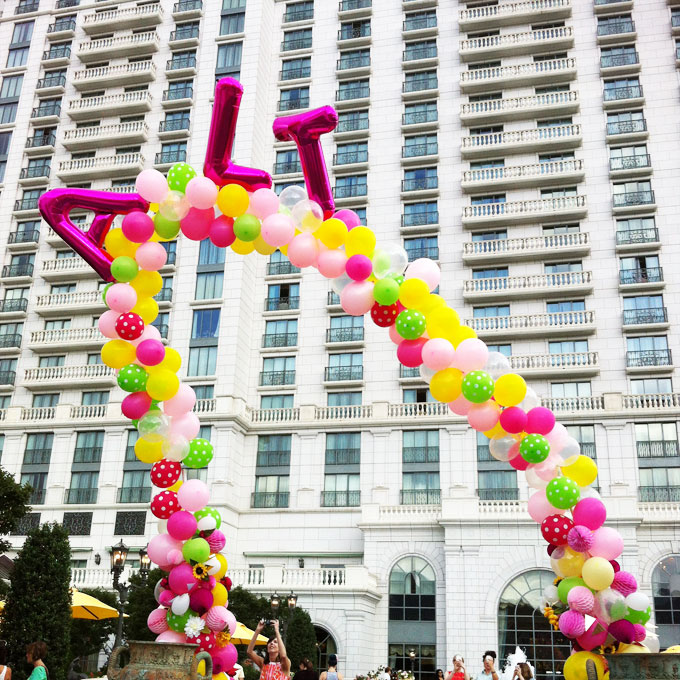
At Alt Summit’s Summer session last month, I had the pleasure of building a massive balloon arch with my friends Sara from Confetti Sunshine and Dawn from Not Just a Mommy. We were given the job of creating a spectacular entrance to one of their fabulous evening soirees, and it had to feature balloons, baskets, flowers, and bubbles. We brainstormed for a few days and then came up with the idea to build a giant arch filled with balloons, honeycomb balls, and flowers, draped with shiny gold garland, and topped with 3 foot-tall shiny, magenta mylar balloon letters. The end result was quite the show-stopper! It was the place to take a selfie at the party. So how did we do it?
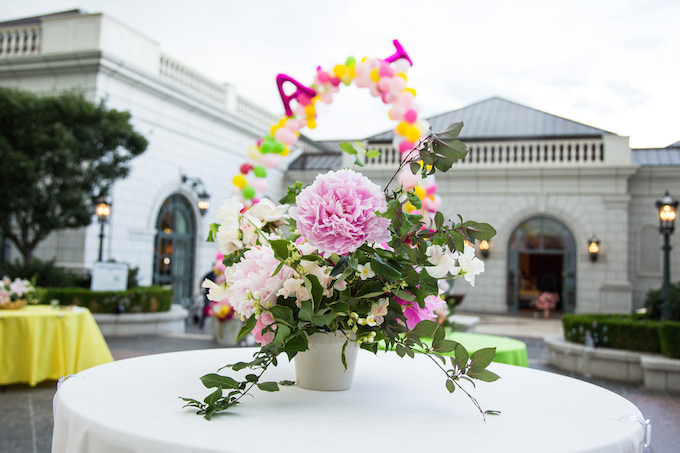 photo by Justin Hackworth
We were super inspired by the amazing balloon installations that Brittany from The House That Lars Built has done in the past–they have really elevated balloon arches and made then fun and chic. Brittany even has instructions on her site for how to recreate one of the amazing balloons pillars from the Midsummer Mingle party she threw a few summers ago. We not only followed her directions, but also borrowed her set-up! She was a champ and let us use some of her equipment, which saved us tons of time. We followed Brittany’s basic instructions for creating her balloon pillars (make sure to visit her post when you’re done reading here!), but here are a few of the things we learned, plus what we did differently with our 30 foot-tall arch!
- The balloons on the sides of the arch are attached to long PVC pipes, so they don’t need to be filled with helium, just air. Buy an electric balloon pump
. Instead of spending hours blowing up balloons, we got to spend that time creating the installation. All 3 of us arrived at Alt armed with double-action hand pumps, but the electric one was the only one we ended up using. It was so fast and so easy to use!
- Tie groups of 3 large balloons together with string, tying them each a few inches apart. Tie the string around the PVC pipe and trim the excess string. Keep tying on groups of large balloons until you get about 12 inches from the end of the PVC pipe.
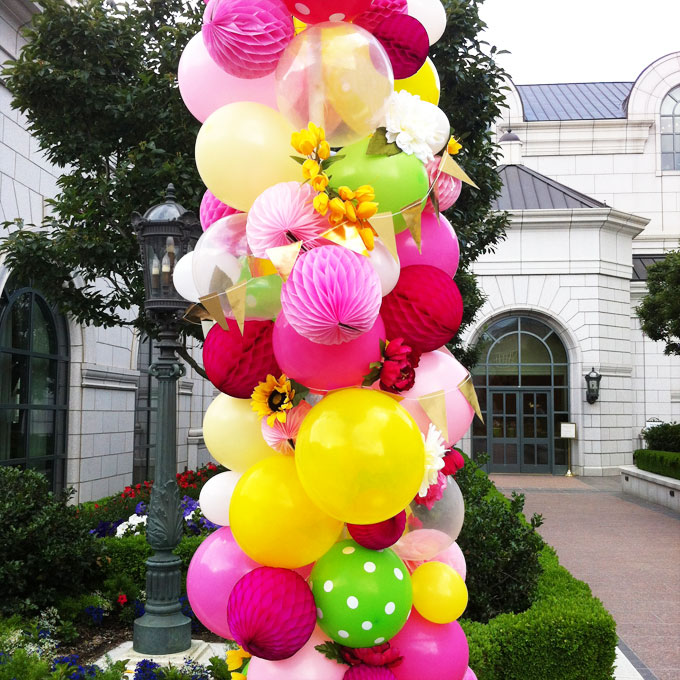
- Use a mix of colors, sizes, and patterns. We used clear, white, lemon yellow, lime green with and without white polka dots, light pink, rose pink, and hot pink with white polka dots. Huge thanks to Oriental Trading for providing us with the balloons we used for our installation!
- When you have all of the large balloons tied on, start attaching smaller balloons. We found that the really heavy-duty glue dots worked fine for the most part. Our poor arch had quite the epic journey due to weather, but if you’re not moving your’s all over the place, those permanent glue dots
will work great.
- Add some great texture with honeycomb balls! We used honeycomb balls in 3 different shades of pink and 3 different sizes. Because they’re heavy, they need to be tied onto the PVC pipe with string. Even though the PVC pipe should be completely covered with large balloons at this point, just push them aside gently while you attach your honeycomb balls. After they’re tied on, if the honeycomb balls don’t seem to want to stay put in the spot you want them, hold them in place with more of those heavy-duty glue dots.
- Add even more texture and lots of interest with realistic faux flowers. For some of our flowers, we left the long stems attached, and simply slid them very gently into place with the stem hidden behind balloons. For others, we snipped or pulled off the flower heads and attached them to the large balloons with, you guessed it, heavy-duty glue dots!
- The icing on the cake for those beautiful pillars is a graceful draping of gold foil triangle garland. We thought they might be over-the-top, but they really made those pillars look fabulous. Thanks to My Mind’s Eye for providing them!
- To turn these pillars into an arch, cut a very long piece of fishing line or string, and securely attach both ends to something heavy. We tied both ends of ours to chairs. Tie 3 helium balloons together with some string or fishing line, then tie the group onto your long piece. Keep adding groups of 3 until the whole arch is filled.
- Fill your mylar letters up with helium, tie them off, and attach them to the arch with string.
- Now for the fun/scary part: attach each end of the arch to the bare end of a balloon pillar. You will need a ladder! We suggest tying the string very securely around the PVC pipe, scooting it down so that the helium-filled balloons blend in with the non-helium balloons, and taping the string in place with several layers of clear packing tape.
It was so much fun to work with Sara and Dawn on this gorgeous project for Alt! Thanks to Oriental Trading and My Mind’s Eye for their donations, and to Brittany from The House That Lars Built for inspiring us, writing a dang good tutorial, and letting us use her equipment.
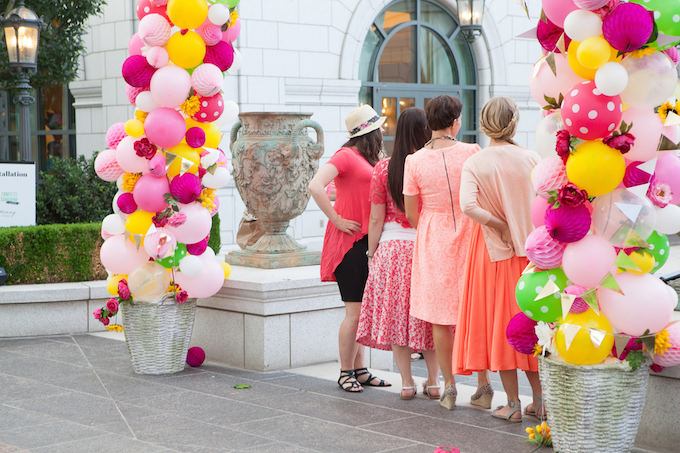 photo by Brooke Dennis
**This post contains affiliate links. You can read more about them on our policies page.**
Umm this is amazing!!! I always love seeing tips on how to refine a process that’s already in place because I feel like it makes it so much easier every time somebody tweaks it!
Yes! Pretty soon, we’ll have the process down!! xoxo
I’ve always wanted to know how to make one of these! Thanks for your insider tips 🙂
So glad I could help, PJ! xoxo
Completely stunning in every way!!!
Thanks, Amy!
You ladies created the most gorgeous balloon arch! Thanks for sharing the details on how to make it. And I can say, it was so beautiful in person 🙂
Aww, thanks, Melissa! It really was so much fun to make. The weather drove me crazy, but it all worked out! xoxo
Oh my gosh I would have wanted to attend Alt just for this alone!!!! I wonder if I can convince my friend to make one for my baby shower…
Of course!! You might need to find a location for the shower that has TALL ceilings! xoxo
It was spectacular. I only wish I could have been there to see it. You are amazing and I am so happy to call you a friend.
You’re the sweetest, Kelly! I wish you could have been there too. Hoping to see you soon out west! xoxo
This is AMAZING!!! You Rock, Melissa!
Aw, thanks! xoxo